If you’ve ever wondered how to replace a taillight bulb, it’s essential to know how these lights are designed.
Taillights and brake lights are built into the same assembly but serve different purposes — one keeps your car visible, while the other signals when you’re slowing down.
Depending on your vehicle, this setup may involve separate bulbs, a single dual-filament bulb, or, in many modern cars, LED assemblies that require replacing the entire unit.
In this article, we break down how to replace a filament taillight bulb, the key signs it’s time to change it, and how brake lights differ from taillights.
This Article Contains:
- How to Replace Taillight Bulbs in 10 Simple Steps
- What Are the Signs Your Taillight Bulb Needs Replacing?
- How Much Does a Taillight Bulb Replacement Cost?
- 3 FAQs about Taillights
Let’s go!
How to Replace Taillight Bulbs in 10 Simple Steps
While taillight bulb replacement might sound easy, a DIY job can be tricky.
Modern vehicles use different setups, from standard filament bulbs to dual-filament designs and LED assemblies, each requiring a different approach. A professional mechanic can identify the right system, handle delicate wiring, and ensure the replacement is done safely and correctly.
Here are the tools they’ll require:
- Flathead and Phillips screwdrivers
- Socket and ratchet set
- Replacement taillight bulbs (or complete assembly if needed)
- Electrical tape (only if wiring issues are present)
- Gloves (to protect hands and avoid touching bulbs directly)
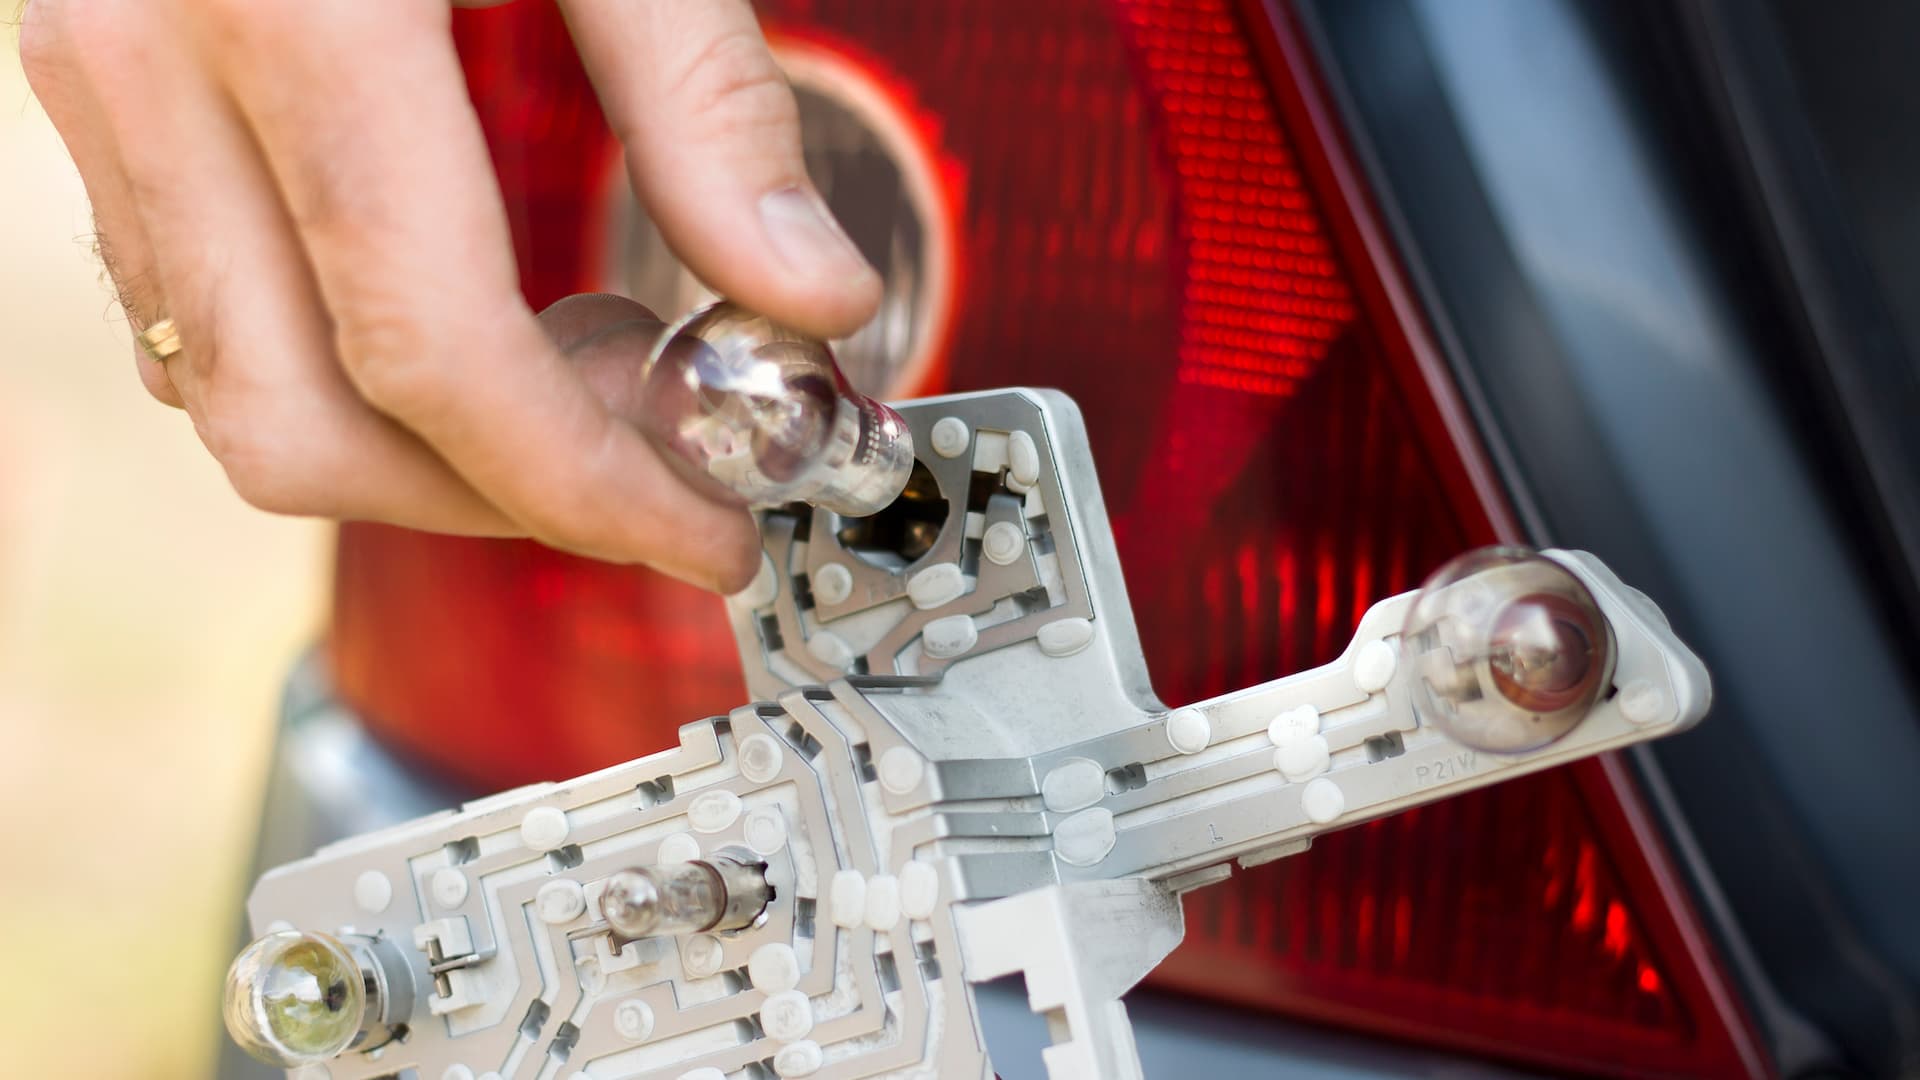
NOTE: These steps apply to vehicles that use filament bulbs for taillights, whether as two separate bulbs or a single bulb with dual filaments. If your car has LED taillights, you’ll need to replace the entire assembly.
Step 1: Prepare the Vehicle
The mechanic will park your car on a flat surface, turn off the engine, and disconnect the battery for safety. They’ll also clean the taillight area to prevent dirt from entering the housing.
Step 2: Open the Trunk or Tailgate
They’ll use the trunk release lever or tailgate handle to access the back of the taillight. Next, they’ll remove or pull back the fabric liner or plastic panel to expose the taillight assembly.
Step 3: Remove the Taillight Assembly (if required)
If they can’t access the bulb from inside, the mechanic will remove the screws or bolts around the taillight cover from the outside and slide out the assembly.
They’ll keep the wiring intact and store the fasteners safely in a container for reinstallation.
Step 4: Identify the Taillight Bulb
The mechanic will check whether your vehicle uses two separate bulbs or a single dual-filament bulb for the tail and brake lights:
- If the vehicle has two separate bulbs, the mechanic will identify the taillight bulb and only replace that. In most cars, it’s located at the outer edge of the rear and has a thinner filament.
- If it uses a dual-filament bulb, they’ll replace the entire bulb, since one unit powers both functions.
Step 5: Remove the Bulb Socket
They’ll rotate the bulb socket counterclockwise to release it. Since the bulbs are connected to a wiring harness, they may unplug it for easier handling. The mechanic will also inspect the socket for corrosion or damage.
Step 6: Take Out the Old Bulb
They’ll gently pull out the old bulb. If it’s stuck due to corrosion, the mechanic may wiggle it slightly or push in and twist (on older designs) to remove it.
Step 7: Install the New Bulb
The mechanic will wear protective gloves while handling the new bulb and apply a small amount of dielectric grease to the bulb’s base to prevent corrosion, being careful not to get any on the glass.
They’ll then align the bulb with the notches, press it firmly into place, and reinsert the socket into the assembly, twisting it clockwise to lock it securely.
Step 8: Reattach the Taillight Assembly (if removed)
The mechanic will slide the assembly back into position, then reinstall and tighten the screws or bolts to secure it.
Step 9: Test the Lights
They’ll switch on the headlights to confirm the taillight bulb works properly.
If your car uses a single dual-filament bulb that powers both the brake and tail lights, they’ll press the brake pedal to check that both functions work.
Step 10: Replace Interior Panels
Finally, they’ll put the fabric liner or plastic panel back and close the trunk or tailgate to complete the job.
With the replacement steps covered, let’s look at the symptoms of a failing taillight bulb.
What Are the Signs Your Taillight Bulb Needs Replacing?
Here are the most common symptoms of a failing taillight bulb:
- Non-operational taillights: If your taillights don’t switch on with your headlights, it’s a clear sign they need replacement.
- Dim or flickering lights: Taillights that appear weak or flicker while driving often indicate failing bulbs.
- Burnt-out bulbs: A taillight that stays completely dark usually means the bulb is burnt out and needs to be replaced.
- Delayed response: If your taillights take longer than usual to light up, this may indicate power issues or damage, which is especially dangerous at night or in low visibility conditions.
- Broken housing: Cracks or breaks in the taillight housing allow water and dirt to enter, which can damage the bulbs and wiring. In such a case, both the housing and bulb will need replacement.
Wondering how much fixing a taillight costs?
Find out next.
How Much Does a Taillight Bulb Replacement Cost?
Replacing a taillight bulb usually costs $100 to $200, including parts and labor. The final price depends on your vehicle’s make and model, local labor rates, and whether you choose original equipment manufacturer (OEM) or affordable aftermarket parts.
The total cost can also vary depending on whether you need to replace one bulb or the entire assembly. Here’s what you need to know:
- If your car uses separate bulbs for the taillight and brake light, only the faulty unit needs replacing.
- In vehicles with a dual-filament bulb (one bulb powering both functions), the mechanic will replace the whole bulb if either filament fails.
- On modern cars with LED taillights, your mechanic will replace the entire taillight assembly, as individual LEDs can’t be replaced. Depending on whether you opt for OEM or aftermarket parts, the cost can range from $200 to $600.
Next, we’ll answer a few more questions you may have about your car’s taillights.
3 FAQs about Taillights
Here are the answers to some other taillight-related queries:
1. Why Are Taillights Important?
Regularly checking and maintaining your taillights is vital for the following reasons:
- Working taillights are required by law, and driving with faulty ones can result in fines.
- They keep your vehicle visible in the dark, rain, or fog, helping to prevent accidents.
- The built-in indicators show when you turn or change lanes, making traffic safer.
- Reverse lights provide extra visibility when backing up, especially in dark or crowded areas.
- Well-maintained taillights improve your car’s appearance and help preserve its resale value.
2. Is It Necessary to Replace Both Taillights at the Same Time?
You don’t always need to replace both taillights — fixing the faulty one is usually enough. However, because they share wiring, the other light may fail soon after.
Replacing both simultaneously ensures even brightness, a balanced appearance, and compliance with safety regulations. It’s recommended to match the correct lens color and bulb wattage, as mismatched or dim lights can reduce visibility and put safety at risk.
3. What’s the Difference Between a Taillight and a Brake Light?
Tail and brake lights are part of the same assembly but serve different functions. The key difference lies in when they turn on.
Taillights automatically activate with the headlights to keep the rear of your vehicle visible at night or in low-visibility conditions. Brake lights, on the other hand, come on only when you press the brake pedal.
Although both lights are red, the brake lights shine more brightly to signal braking clearly, even when the taillights are already on.
Don’t Let a Burnt-Out Bulb Dim Your Safety
Working taillights may seem like a small detail, but they play a big role in keeping you safe on the road. If you notice dim, flickering, or non-functional lights, don’t ignore the problem.
Contact AutoNation Mobile Service instead.
We bring certified mechanics to your driveway with convenient online booking, upfront pricing, and a 12-month, 12,000-mile repair warranty.
From quick bulb replacements to full assembly changes, schedule a service with us, and we’ll ensure your taillights are working properly so you can drive confidently.