Want to know how to change an oil filter quickly and correctly?
It isn’t as simple as it seems because to do the job, you first need to know the difference between cartridge and spin-on style filters. You also need handy tools, such as wrenches and ratchets.
Starting to sound more complicated than you expected?
Don’t worry. We’ll break down the replacement process step-by-step and tell you how frequently you need to change oil filters for your car’s overall well-being.
This Article Contains:
- How to Change a Cartridge-Style Oil Filter the Right Way
- How to Replace a Spin-On Style Oil Filter Correctly
- Why Is Changing an Oil Filter Important?
- How Often Should You Change a Car’s Oil Filter?
- How Much Does an Oil Filter Change Cost?
- What Are the Different Types of Oil Filters and Their Functions?
How to Change a Cartridge-Style Oil Filter the Right Way
Replacing an oil filter isn’t difficult, but overtightening or installing an incorrect unit can result in leaks and wasted oil. So, calling a professional would be the best approach.
That said, the replacement steps differ between cartridge and spin-on filters. Let’s first look at how a mechanic will change a cartridge filter.
Step 1: Park the Car and Start the Engine
After parking your car, they’ll run it briefly to warm up the engine. Warming the fluid before an oil change service will make it easier and faster to drain.
IMPORTANT: The mechanic will avoid running the car too long, as extremely hot oil can cause burns.
Step 2: Find the Oil Pan and Drain the Old Car Oil
They’ll raise your vehicle using jack stands, locate the pan, and find the oil drain plug near the engine block. They’ll then place an oil drain pan underneath it and remove the oil plug using a socket wrench.
Afterward, they’ll collect the fluid in an oil drain pan and refix the plug.
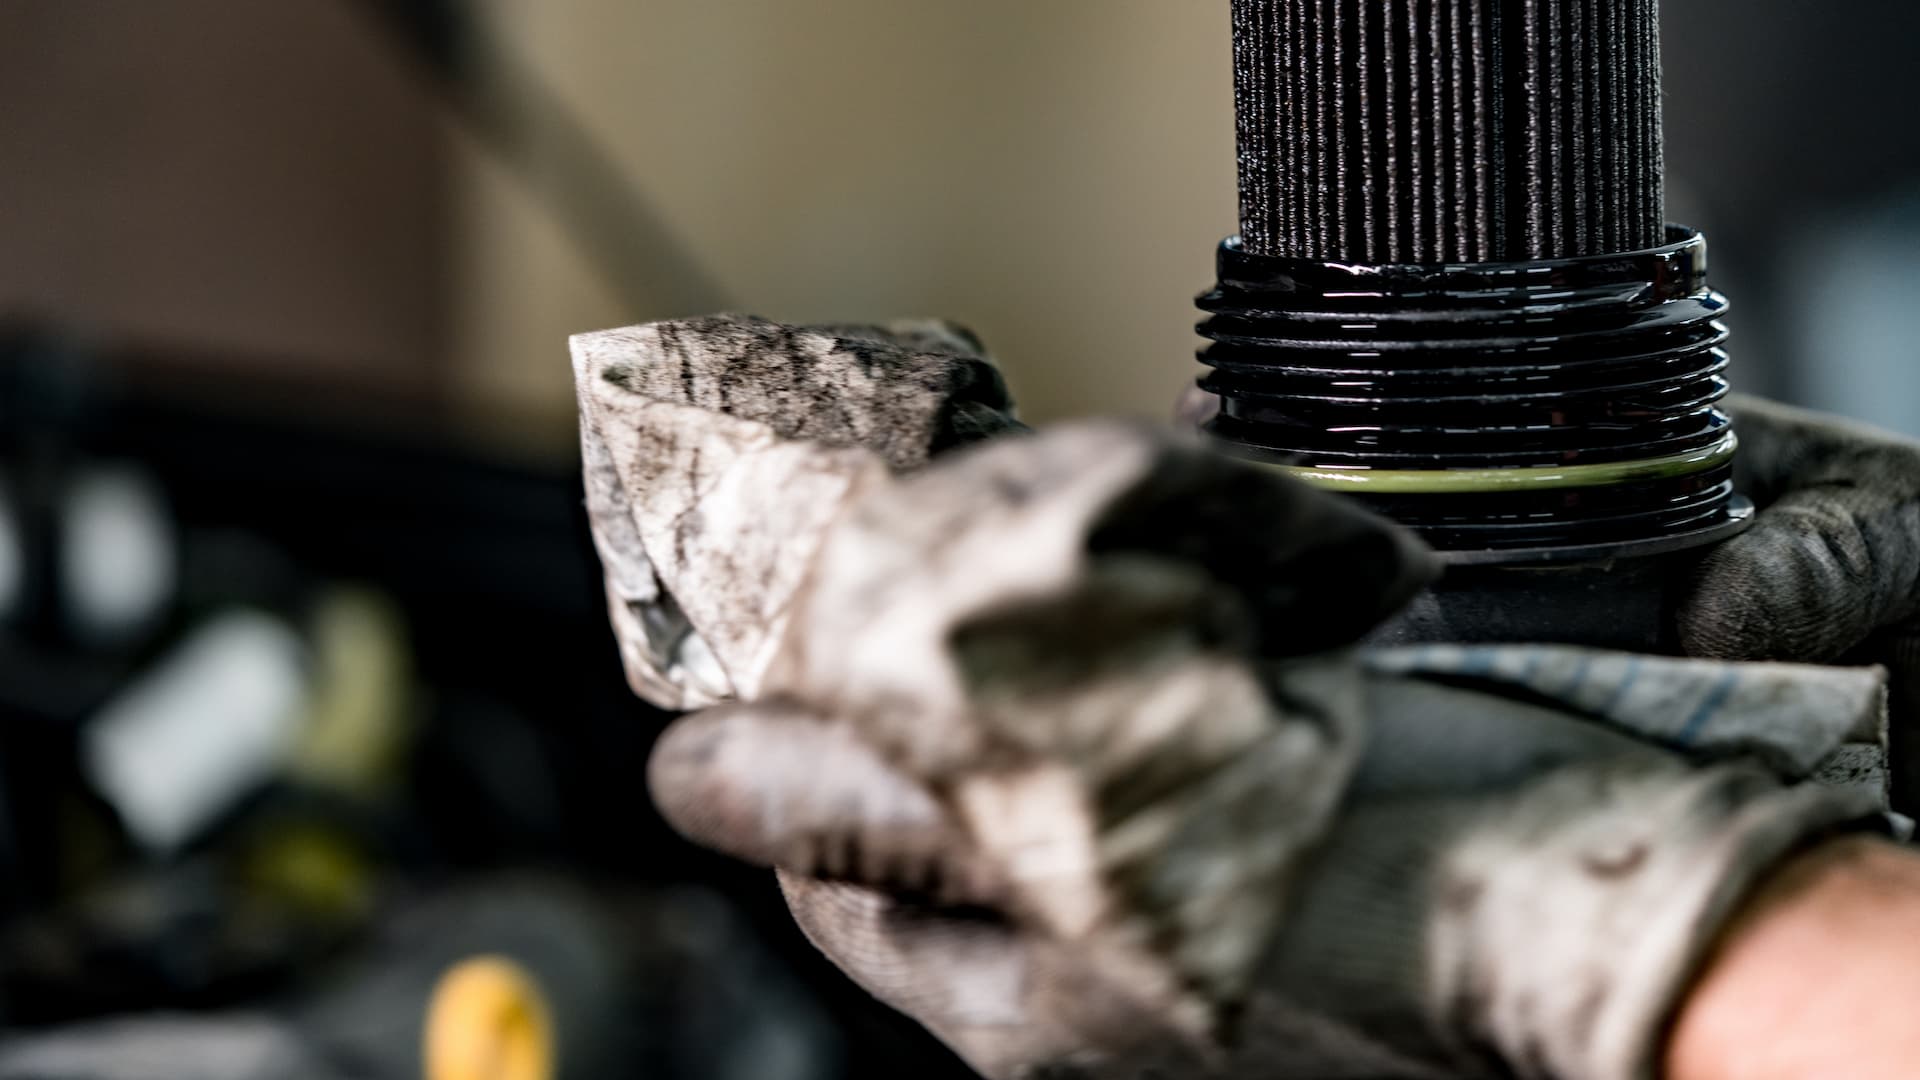
Step 3: Locate the Old Oil Filter and Remove It
They’ll open the hood and check the manual for the filter’s location. It’s usually housed in a plastic or metal housing on top of the engine block.
The professional will use a ⅜ inch ratchet to remove the housing cap and pull out the old oil filter with their hand. Then, with a flathead screwdriver, they’ll remove the O-ring from the cap and clean the cap before installing the new O-ring.
Step 4: Install the New Oil Filter and Filter Cap
The mechanic will insert the new cartridge filter in the housing, place a new O-ring on the cap, and lubricate the ring with clean oil.
They’ll then carefully thread the cap back into the filter housing. Once the O-ring is seated on the housing’s base, they’ll refer to the vehicle manufacturer’s specifications to tighten the cap.
Step 5: Open the Oil Fill Cap
They’ll remove the oil filler cap, add fresh oil, and run the engine for a few minutes to check for leaks. If the mechanic finds leaks, they’ll repair them and add more clean engine oil.
During this step, they’ll ensure not to pour excess oil. Adding excess oil can cause spillage, exhaust smoke, and other serious issues.
Afterward, they’ll check the oil level, close the hood, and lower the vehicle. Lastly, they’ll send the old filter and oil to an approved recycling facility.
Now, let’s see how they’ll change the spin-on style filter.
How to Replace a Spin-On Style Oil Filter Correctly
To swap out a bad spin-on oil filter, the mechanic will:
Step 1: Follow Steps 1 to 3
Similar to replacing the cartridge filter, they’ll raise the vehicle, locate the oil pan, remove the oil drain plug, and extract the fluid.
Then, they’ll locate the spin-on filter, which is usually near the oil pan on the engine block.
Step 2: Loosen the Old Spin-on Filter
They’ll use an oil filter wrench to turn and loosen the spin-on filter counter-clockwise to remove it. Then, they’ll inspect the filter to ensure the rubber gasket, usually attached to the filter, has come off as well.
Leaving the old gasket behind can cause double gasketing, which can lead to leaks and gasket failure.
Step 3: Install the New Oil Filter
They’ll apply clean oil to the rubber gasket, carefully thread the new filter, and hand-tighten it until it reaches the base.
Once done, they’ll use an oil filter wrench to secure it as per the vehicle manufacturer’s instructions.
Step 4: Add Fresh Engine Oil and Check for Leaks
Now, they’ll open the hood and the oil fill cap to add fresh oil. Then they’ll start the car, inspect for fluid leaks, and recheck the oil level.
Finally, they’ll close the hood, lower the vehicle, and send the old filter and oil to a disposal center.
Don’t want to replace your old filter yet?
Keep reading to see why you should.
Why Is Changing an Oil Filter Important?
When you drive, your vehicle’s engine parts, such as pistons and crankshaft bearings, generate friction. Over time, this friction between parts releases tiny metal and dirt particles into the oil.
The oil filter traps these particles to protect the engine. However, it can gradually become filthy and fail to trap the impurities, which then circulate in the engine and cause damage. That’s why regular oil filter replacement is essential.
Here’s how a routine filter replacement helps:
- Keeps the car oil clean and flowing properly
- Reduces engine wear and extends its lifespan
- Improves the engine performance and helps maintain fuel efficiency
Since the replacement has several benefits, let’s see when you should change the filter next.
How Often Should You Change a Car’s Oil Filter?
You should ideally change an oil filter after every second oil change service, or follow these general guidelines based on the oil type:
- Conventional oil filter: Every 5,000 to 7,500 miles
- Synthetic oil filter: Every 15,000 miles
But you may have to contact a mechanic sooner if you notice these signs:
- An activated oil pressure warning light
- Odd rattling or clicking engine noises
- Burning oil smell
- Engine sputtering
- Black or gray smoke from the exhaust
- Poor engine performance
- An overheating engine
- Dark, sludgy motor oil found during a visual inspection
Curious about what this service might cost you?
Read on to find out.
How Much Does an Oil Filter Change Cost?
The cost of replacing the oil filter depends on your vehicle’s model, labor charges, filter, and the oil type your car uses, for instance:
- Conventional oil filter replacement: $75 to $250
- Synthetic oil filter replacement: $105 to $300
Want the exact amount to budget for the service? Find oil filter replacement costs here.
If you’re ready for the replacement but unsure about needing a vehicle-specific filter, explore the different types before deciding.
What Are the Different Types of Oil Filters and Their Functions?
Oil filters fall into two main categories: Primary (full-flow) and secondary (bypass) filters.
Here’s what each does:
A. Primary Oil Filters (Full-Flow)
These filters clean 100% of the motor oil and are essential for overall engine protection. Two common primary filters include:
- Cartridge oil filter: This filter is made of cellulose media (the material that traps contaminants) and plastic, making it easier to dispose of and useful in modern cars. However, changing it involves the risk of damaging the filter housing and O-ring, which makes it expensive.
- Spin-on oil filter: This filter is inexpensive and easy to replace. However, the filter has multiple parts, like a metal casing and a rubber gasket, that make its production more complex and less sustainable than cartridge units.
B. Secondary Oil Filters (Bypass)
Secondary filters clean a small portion of oil (less than 10%), removing finer particles that the primary filter may miss. These work independently and can be installed for extra engine protection.
Three popular secondary filters are:
- Spinner (centrifugal) filter: Uses centrifugal force to trap contaminants and is usually used in high-performance engines.
- Magnetic filter: Captures metal debris in the oil. To maximize efficiency, it should be used with another filter rather than independently.
- Thermal chamber filter: Utilizes heat to burn off impurities and improve flow in cold conditions. However, using this filter may shorten your car’s battery life as it requires extra power to perform its function.
Unlock Swift Oil Filter Changes Right From Your Driveway
Changing an oil filter is critical to maintaining your vehicle’s engine health and enjoying a safe ride. But for many car owners, this can be a messy and inconvenient task.
That’s where AutoNation Mobile Service experts come in.
Our mobile mechanics can handle the messy filter change and add fresh engine oil without any trouble.
You also get easy online bookings and fair pricing, backed by a 12-month, 12,000-mile warranty on services, including regular oil changes and power steering fluid refills.
Contact us to book your hassle-free oil filter change today.