Rear differential fluid replacement involves removing the old lubricant and adding fresh fluid. This process includes lifting the vehicle, removing the fill and drain plugs, draining the used fluid, and refilling the differential with new lubrication.
Here’s a brief breakdown of the steps involved in changing rear differential fluid:
- Jack up the vehicle for the replacement process
- Locate the differential and remove the fill plug first
- Remove the drain plug and drain the old fluid
- Clean the housing and cover
- Reinstall the drain plug or cover
- Add new differential fluid
- Reinstall the fill plug
- Test drive the vehicle
If these steps look overwhelming and you need expert help, look no further than AutoNation Mobile Service. We’ll perform rear differential fluid changes wherever you are.
But if you still wish to do it yourself, this article provides a detailed description of the process and also covers how to choose the right fluid for your vehicle.
This Article Contains:
- How to Change the Rear Differential Fluid Step-by-Step
- How Much Does a Rear Differential Fluid Change Cost?
- When Should You Change the Differential Fluid?
- How to Choose the Right Differential Fluid
How to Change the Rear Differential Fluid Step-by-Step
Changing rear differential fluid can get risky if done wrong. One mistake with the fluid type, quantity, and sealing can lead to gear wear, overheating, or even total differential failure.
Without the right tools, lift access, or technical expertise, you may cause more damage than you can fix. That’s why this job should be left to a professional mechanic who knows how to do it right the first time.
Here’s how they’ll go about replacing your rear differential fluid:
Step 1: Prepare the Vehicle
The mechanic will park your car on a flat surface and engage the parking brake. If your vehicle sits low to the ground, they’ll use a jack to lift the rear and secure it with jack stands.
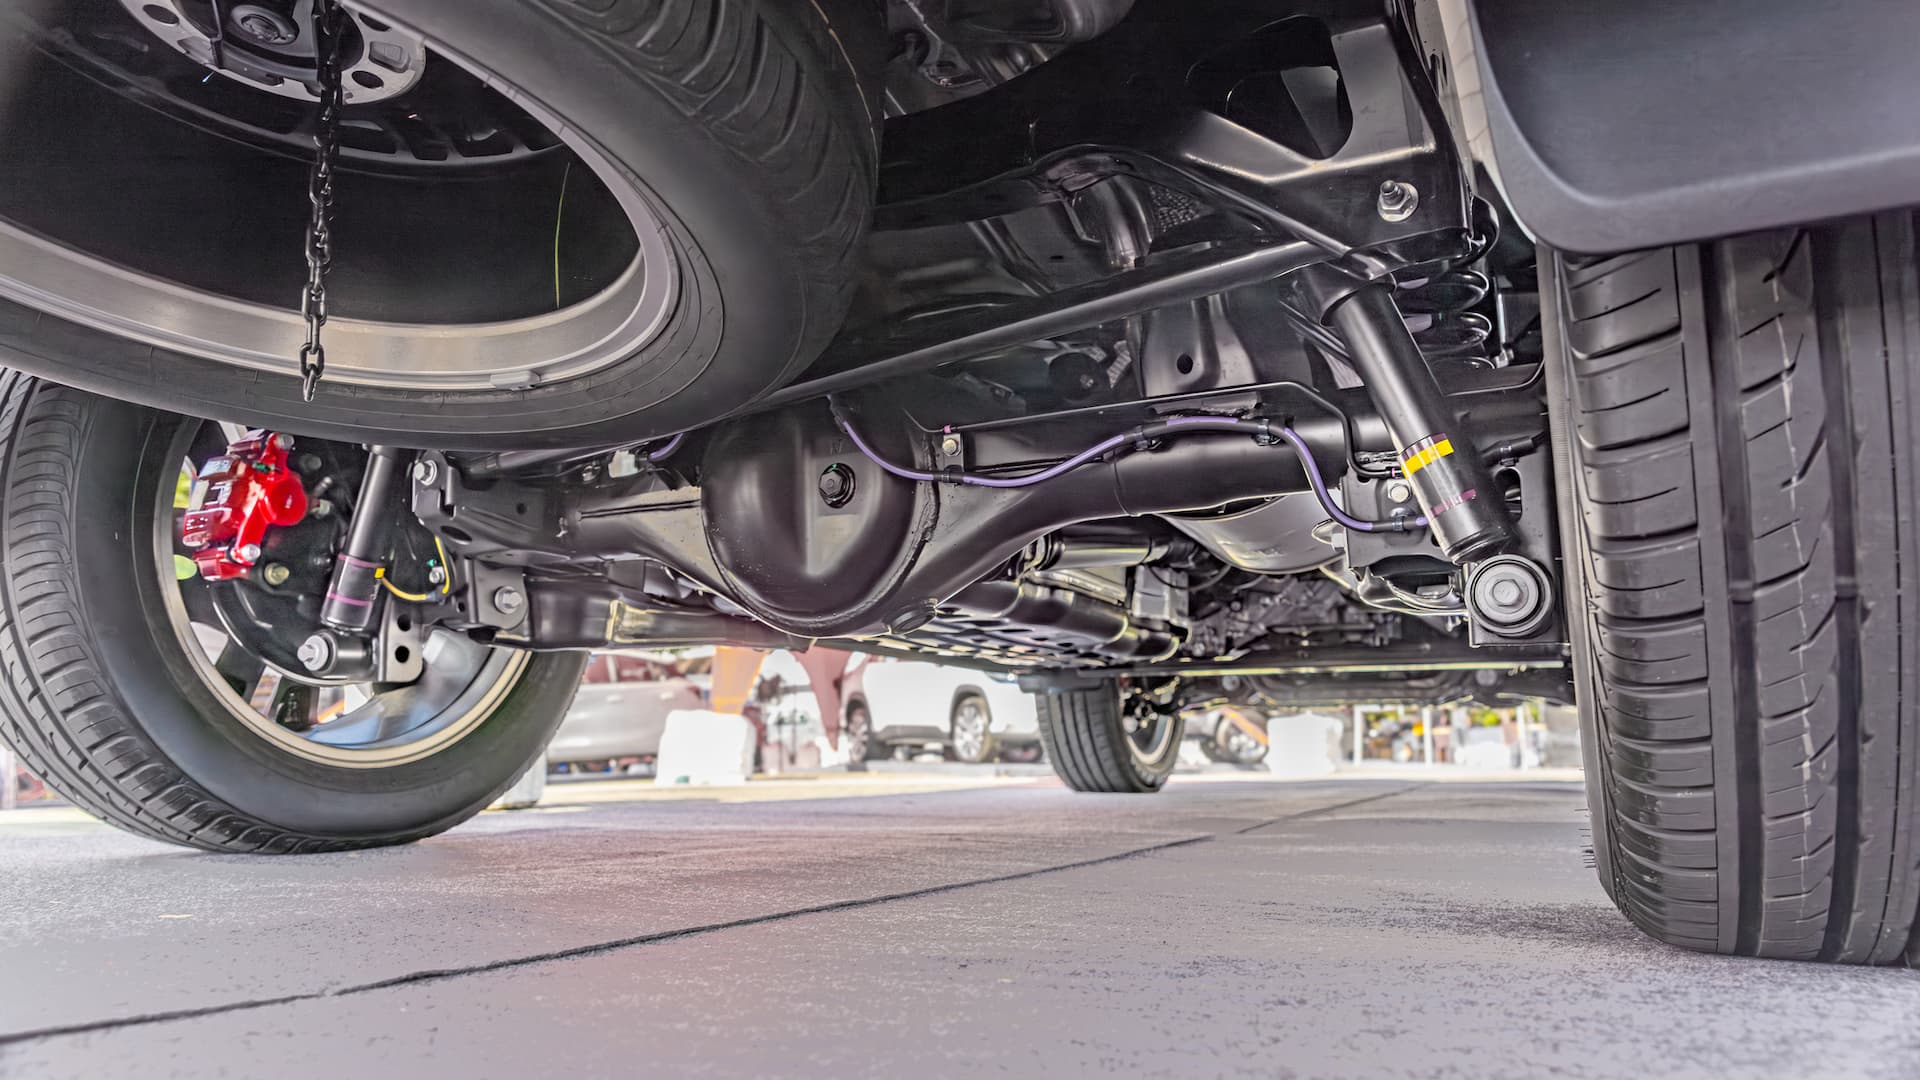
Step 2: Locate the Differential
They’ll find the rear differential housing, which is usually a metal casing located between the rear wheels.
Step 3: Remove the Fill Plug
The mechanic will remove the fill plug, a small threaded bolt usually located halfway up the differential housing, to add or check fluid levels. They’ll do this process before draining the fluid to ensure the plug isn’t seized or damaged. A stuck plug would make refilling impossible after draining.
Step 4: Drain the Old Fluid
The mechanic will place a catch pan directly beneath the differential. If your vehicle has a drain plug, they’ll remove it and allow the fluid to drain completely.
If there’s no drain plug, they’ll remove the entire rear differential cover by loosening the bolts around it. As the cover comes free and fluid begins to pour out, they’ll position the catch pan carefully to prevent any mess.
Step 5: Clean the Housing and Cover
Once done, the mechanic will use brake cleaner to clean the inside of the differential housing and the rear cover.
If they remove the cover, the mechanic will carefully scrape off any old gasket material or room-temperature vulcanizing (RTV) sealant from both mating surfaces. This ensures a proper seal during reassembly. The mechanic will then leave all components to dry completely.
Step 6: Reinstall Drain Plug or Cover
If the differential has a drain plug, the mechanic will reinstall and torque it to the manufacturer’s specifications.
If they had removed the cover, they would apply a new gasket or a uniform bead of RTV sealant around the edge and reattach the cover. They’ll then tighten the bolts in a crisscross pattern to ensure an even seal and prevent future leaks.
Step 7: Add New Differential Fluid
Before refilling, the mechanic will check your manufacturer’s service manual to verify the correct fluid type, viscosity, and quantity. Then, using a fluid pump, they’ll fill the rear differential through the fill hole until the fluid begins to trickle out slightly, which indicates the differential is full.
Step 8: Reinstall Fill Plug
Once the fluid reaches the correct level, the mechanic will reinstall the fill plug and tighten it securely. Then, they’ll double-check for any drips or spills around the plug and wipe the area clean.
Step 9: Clean Up and Test Drive
They’ll clean up any excess oil, remove their tools, and safely lower the vehicle if the mechanic lifted it.
Finally, they’ll take it for a short test drive and check the rear differential for any signs of leaks around the plugs or cover.
If you’re curious about how much this process will cost you, look no further.
How Much Does a Rear Differential Fluid Change Cost?
A rear differential fluid change typically costs around $180 to $320+. This includes:
- Parts: around $150
- Labor: $30 to $170
However, the total cost can vary based on local labor charges, vehicle type, and the required fluid.
Wondering how often you should get this service?
Keep reading to find out.
When Should You Change the Differential Fluid?
In most cases, you’ll need to change the differential fluid every 30,000 to 50,000 miles.
But this lifespan can vary depending on your vehicle model, differential type, and driving conditions. For instance, off-roading and heavy traffic can require frequent differential fluid changes.
That said, you should contact a professional sooner if you notice the warning signs.
7 Symptoms of a Bad Differential Fluid
Here are some indications that you need a differential fluid change:
- Whining or howling noises while turning and accelerating
- Excessive vibration during driving
- Difficulty turning or unusual resistance in corners
- Burning smell from the differential area
- Visible fluid leaks near the rear differential housing
- Uneven tire wear
- Reduced fuel efficiency due to increased friction
Choosing the right type of differential fluid is key to making it last. Let’s break down how to select the best one.
How to Choose the Right Differential Fluid
Here are some tips you can use to pick the right differential fluid for your vehicle:
- Check your owner’s manual: It will specify the recommended differential fluid type, viscosity, and necessary additives.
- Know your oil type: Gear oils generally come in two types. Conventional gear oil works well for light-duty or older vehicles, while synthetic gear oil offers better protection under extreme temperatures.
- Check for additive requirements: Many gear oils have pre-mixed additives, such as friction modifiers, but others may require you to add them separately. Skipping this step can lead to noise, chatter, or improper function.
- Look for API GL ratings: The American Petroleum Institute Gear Lubricant (API GL) rating indicates the oil’s protective capabilities. Most rear differentials use gear oil with a GL-5 rating, which can handle the high-pressure conditions of the ring and pinion gears. Always match the GL rating to your manufacturer’s spec.
Get Quick Rear Differential Fluid Changes from Mobile Auto Experts
Neglecting your rear differential fluid can lead to serious problems, like gear wear, overheating, and eventually complete differential failure.
However, attempting to change it yourself without the right tools or expertise can worsen matters.
That’s why you should trust professionals like AutoNation Mobile Service to handle your differential fluid replacement correctly. With us, you get upfront pricing and the confidence of a 12-month, 12,000-mile repair warranty on all your services.
Contact today to keep your differential running smoothly with fresh fluid and zero leaks.