To replace a taillight cover, you should have the right tools and work carefully to keep the lens and wiring intact.
Here’s a step-by-step guide for replacing a taillight cover. It provides instructions for cars with a two-piece taillight (separate bulb and lens cover) and sealed units (replaced as one):
Step 1: Prepare the vehicle
- Park on level ground and shut off the engine.
- Disconnect the negative (black) battery cable with a wrench.
Step 2: Check the owner’s manual
- Confirm whether the car has a two-piece taillight or a sealed assembly.
- Note where the access point is — inside the trunk, cargo area, or rear panel.
- Open that area to reach the taillight.
Step 3: Gather tools and materials
- Gloves to protect hands and keep the lens smudge-free
- Safety glasses
- Replacement taillight cover designed for your exact vehicle model
- Phillips or flathead screwdriver for screws
- Socket and ratchet set for bolts
Step 4: Locate the fasteners (screws, bolts, or clips)
- Pull back any trunk liners, panels, or trim in the way.
- Locate the screws, bolts, or clips securing the cover.
- Two-piece taillights often have screws on the outside.
- Sealed assemblies are usually fastened from inside the trunk or bed.
Step 5: Remove the old cover or assembly
- For two-piece taillights, unscrew or unbolt the fasteners, or release clips with a trim tool.
- For sealed assemblies, unbolt the housing and pull it straight out.
- Disconnect the wiring harness by pressing the release tab.
- Twist bulb sockets counterclockwise if they pass through the cover.
- Set all screws, bolts, and clips aside for reuse.
Step 6: Install the new cover or assembly
- For two-piece taillights, align the new cover, snap in the clips, and reinstall the screws by hand before tightening.
- For sealed assemblies, reconnect the wiring harness until it clicks, position the housing, and secure it with bolts.
- Twist bulb sockets clockwise to lock them in.
- Tighten screws or bolts firmly, but don’t overtighten — it could crack the lens.
Step 7: Test the light
- Reconnect the battery cable.
- Turn on the headlights, press the brake, and check the turn signals.
- Confirm all bulbs work and shine evenly.
- Make sure the lens sits flush without gaps.
Step 8: Reassemble and seal
- Reinstall trunk liners, trim panels, or cargo covers.
- Clip or screw them back in securely.
- Check that the taillight housing seals tightly against the body to keep out moisture.
- If your vehicle uses sensor-based taillights, scan for error codes with an OBD-II reader.
If you want to avoid the hassle of a DIY, a mechanic from AutoNation Mobile Service can come to you and replace the taillight cover right from your driveway.
Want to know the cost or how long the service takes before making a decision?
In this guide, we’ll break down the vital information, so you know what to expect.
This Article Contains
How Much Does It Cost to Replace a Taillight Cover?
Expect to spend around $70 to $370 to replace a taillight cover. The final cost depends on your vehicle and whether you do it yourself or hire a professional mechanic.
Here’s a breakdown of the costs:
- Part costs:
- Aftermarket covers: $20–$100
- OEM (original equipment manufacturer) covers: $50–$200
- Labor costs (professional installation): $50–$170, depending on location and installation complexity
If you still have some concerns, the next section covers key points to keep in mind.
3 FAQs about Replacing a Taillight Cover
Let’s clear up some common questions about replacing a taillight cover.
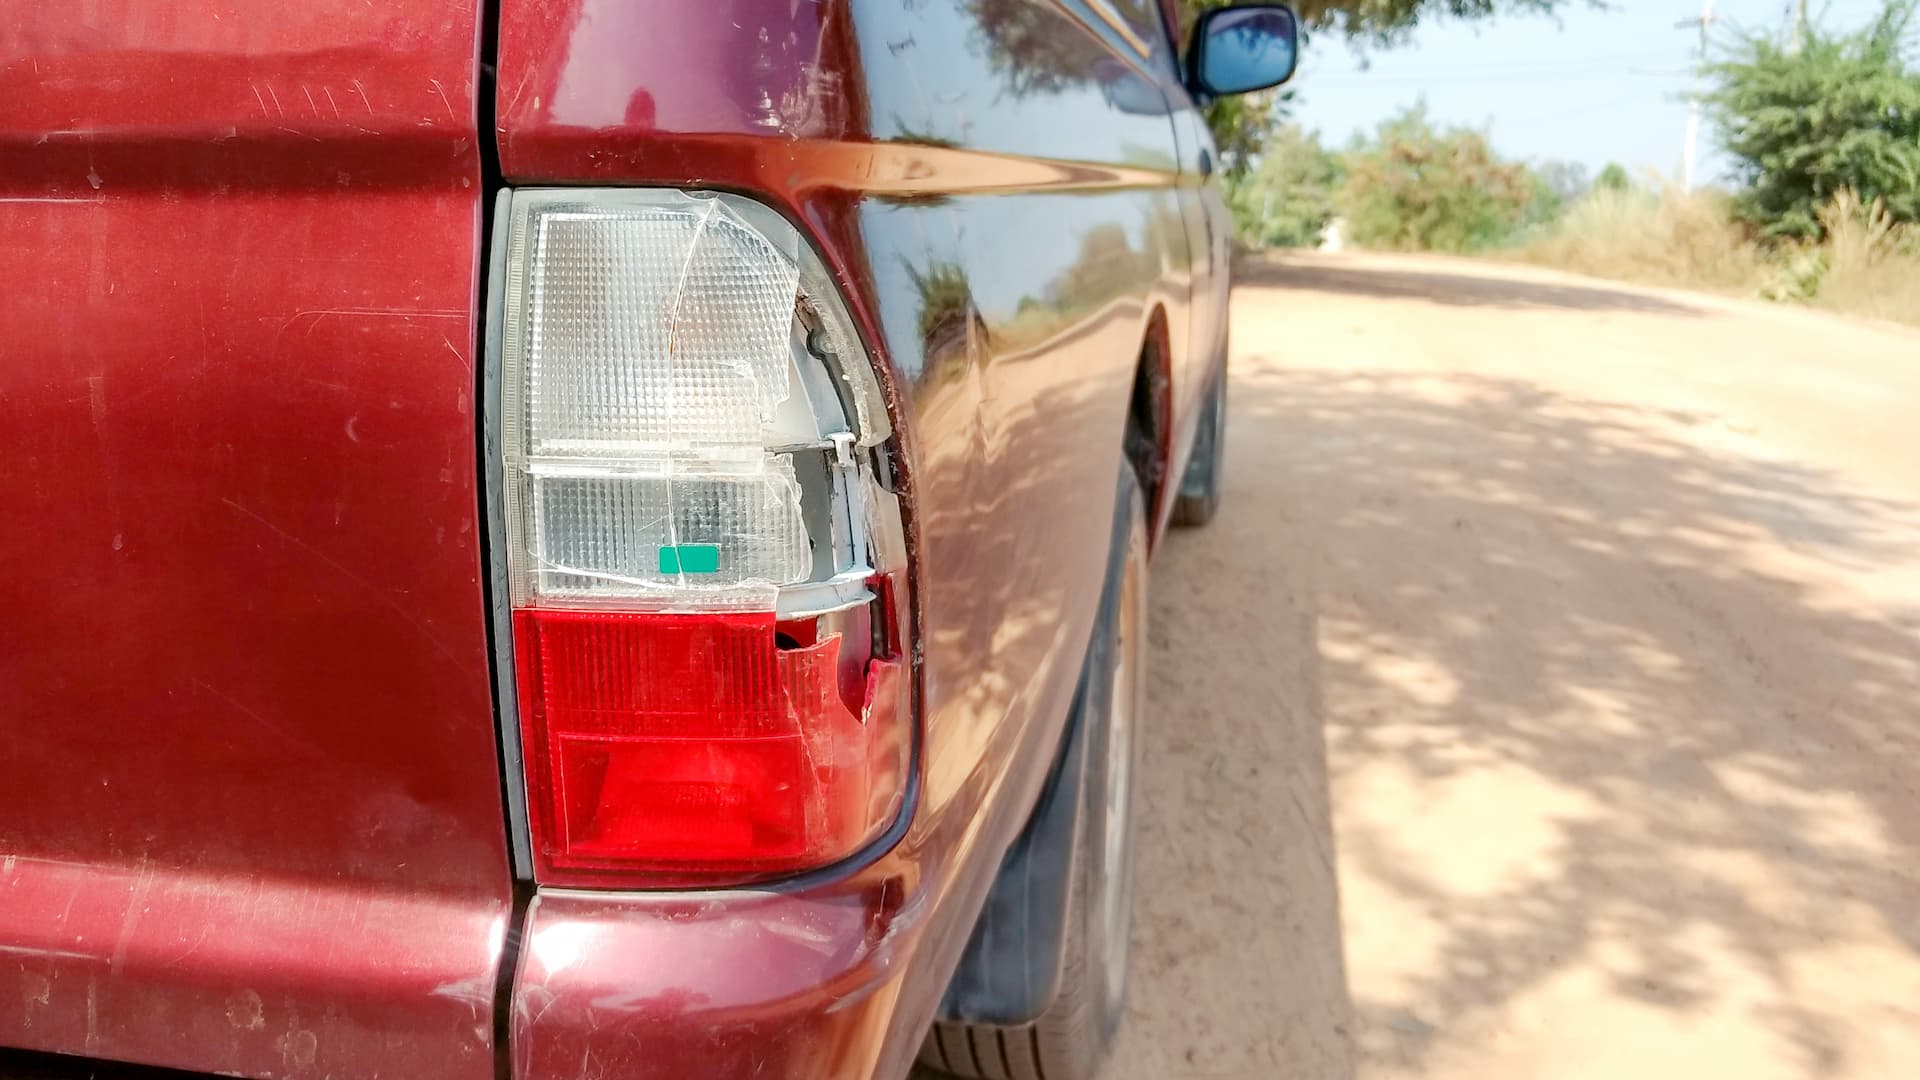
1. How Do You Know It’s Time to Replace a Taillight Cover?
You should replace a taillight cover if it’s cracked, foggy, or loose. Here’s why:
- Cracked or broken plastic: Cracks let in moisture and dirt. This can dim your lights and make it harder for other drivers to see you.
- Foggy or wet inside: Condensation can reduce light output and, over time, cause electrical problems.
- Loose or rattling: A wobbly cover can fall off or misalign the light, making it less visible and increasing the risk of an accident.
2. How Long Does It Take to Replace a Taillight Cover?
Replacing a taillight cover usually takes 20–30 minutes. However, the time may vary slightly depending on how easy it is to access the light and the skill of the person doing the job.
Professional mechanics usually complete the job faster, given their expertise and familiarity with the process.
3. Is It Legal to Drive with a Broken Taillight Cover?
No. In most U.S. states, the law requires both rear lights to function properly. If even one taillight cover is broken, police can stop you and issue a fix-it ticket or a fine. They enforce this rule because a damaged cover reduces visibility and creates safety risks.
For instance, a broken taillight cover can:
- Let in moisture and dirt, which may damage the wiring and cause the bulb to fail.
- Even if the bulb still works, it can scatter the beam or expose white light instead of red. White light can confuse drivers behind you, make your vehicle harder to see, and increase the risk of a rear-end collision.
To protect yourself, safeguard other drivers, and stay compliant with the law, you should repair or replace a broken taillight cover promptly.
Choose AutoNation Mobile Service for Fast, Hassle-Free Taillight Repairs
If your taillight cover is cracked, foggy, or loose, it’s crucial to replace it quickly to stay safe on the road and avoid a ticket. The job is usually straightforward for someone with the right tools and know-how.
If you don’t want to spend the time or effort doing it yourself, AutoNation Mobile Service makes things easy. Our expert technicians will come to you and replace your taillight cover right from your driveway.
You also get upfront pricing, simple online booking, and a 12-month, 12,000-mile warranty on all services.
Book your service today and enjoy a hassle-free taillight cover replacement.